garden, seeds, weather

A Formula for Seed Starting Success

I have never really given much thought to the science of starting seeds.  I estimate our set out time (here in Zone 5b) to be somewhere between Mother’s Day and Memorial Day. So mid to late May.  I usually start my seeds on St. Patrick’s Day – mid March.  No science to this logic whatsoever.  Most years it works, depending on what seeds I’m starting.

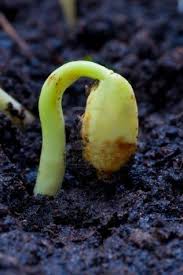
seedling

So I’ve been reading many other blogs and a few have mentioned a starting formula, a seed starting schedule.  Wow – a formula for starting my seeds.  I should have thought of this myself!

We seriously need to start with the seeds.  And if you have organized your seeds like me, you know exactly where to find them!   Check your seed packets and separate them into 2 categories – those that are sown directly into the soil, and those that are started indoors.  Most annuals will be sewn directly into the soil.  Most perennials will be started indoors.  But take a look.

Most of my seeds indicate “6-8 weeks before last frost date”.

Last frost date?  Just how am I supposed to guess at the last frost date?  There’s an app for that – well probably, but I did a quick Google search and, lo and behold, a link that reveals the last frost date!   Check it out, compliments of the Farmer’s Almanac!  You can find cities in the US here, and any Canadian cities will be linked to the closest US Climate Station.  Interestingly enough, there are no guarantees here.  The site claims to be 50% accurate!  Hah!  It’s their best guess, I guess!  My last frost date is May 1.

Sort your packets according to these recommendations.  I added a small sticker to indicate (in large numbers!) which week to start, 4, 5, 6, and so on. Some packets, especially those for perennials, may only tell you how long it takes the seeds to germinate. If that’s all you have to go on, take that figure (which is usually a range) and add 6 weeks. Then label the packet accordingly.

If there’s no information on the seed packet, you can pretty safely just start all your seeds about 6 weeks before you’ll plant them outdoors. Make note of which plants are too big or too small at planting time, and then you can make adjustments next year based on your notes.

Creating the Calendar

To calculate your planting dates, you need to count back from the last frost date in one-week increments. (I base my calendar on Saturdays, because that’s the day that I usually have available for seedstarting). In my area, the last frost date is May 1.  For me, when I count back from May 1, Week 4 is April 3, Week 11 is the week of February 13, etc. Simply write the week number (8,4, 6 or whatever) on the seed packet.  When the planting week arrives, you just grab the right packet and start planting.

Making Adjustments

Now that you have a great schedule, here are a couple of reasons you may want to make some adjustments:

Start earlier: Seeds take longer to germinate and plants grow more slowly when air and soil temperatures are cool (below 70 degrees F). If you plan to start your seeds in a cool basement or cool bedroom, you may want to shift your whole schedule a week or two earlier.

If you have a cold frame or greenhouse, or if you use row covers or water-filled teepees, you can plant tender seedlings several weeks before the last frost date. Just count back from that expected planting date to get the right date to sow your seeds.

Start later: If you grow your seedlings in a greenhouse or a very warm room, you should cut a week or more out of your schedule. Heat promotes rapid growth, and you could find yourself with giant plants that are ready for the garden before warm weather arrives.

So, back to my seed collection.  Most of my seeds that can be started indoors should start 6-8 weeks before last frost date.  Seven weeks before May 1, is the week of St. Patrick’s day.  So, according to my system, I wasn’t so far off with my “St. Patrick’s day” to “Mother’s day” formula.  If I back it up just a bit, I should be able to enjoy a couple more weeks, 50% of the time.

Ah, but beware!  Last year was one of the “other” 50% frost dates, as we had a killing frost in late May.  By the time I went out to purchase the annuals I hadn’t started, most gardeners in these parts were purchasing their second crop, and the nurseries were sold out.  Good for those nurseries, not so good for me.

seeds

Seeds of Organization

Those of you who know me well are not surprised that I actually want to organize my seeds.  It’s a project that has been a long time coming, tho.

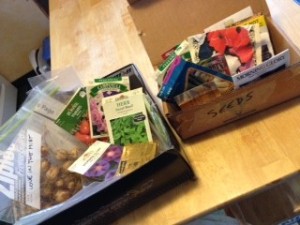
This old shoebox had been as close to organizing the seeds as I’d ever come.  photo (2)Not real sure about what was contained here, but at least I knew where the seeds were!

I started out by weeding out the seeds that were more than 5 years old.  I tested a few this past spring and got 0% germination rate, so I felt pretty good about tossing them.

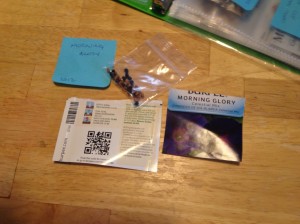
I have many packets of store-bought seeds and many zip lock sandwich bags of seeds that I have gathered from nature.  For the store-bought variety, I placed the seeds in these small 2×2 zip lock bags I purchased online.

pieces

If you search on Amazon.com for “2×2 baggies”, you will find many vendors to choose from.  I then cut the envelope front for a picture of what will grow, and cut the back for directions on how.

For the seeds I gathered, I made sure to label the zip lock bags with a description and a hint of where they came from.

complete pages

For both sets I included the date, either of the “packed for” year or the year I gathered.

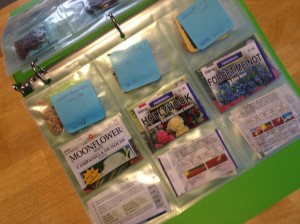
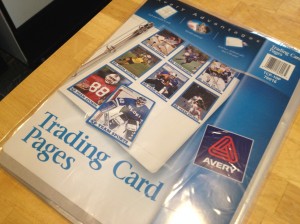
These trading card pages are the perfect size to catalog and store the seeds.

pages

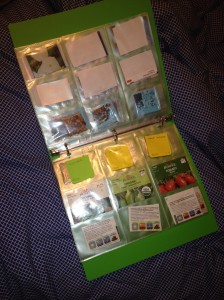
I bought mine at Wal-Mart, and you can get them at any office supply store.  I sorted mine by flower v. vegetable v. herb.  I haven’t done much vegetable growing, so most of my seeds are flowers.  I have many collections of columbine and marigolds, so I have a whole page dedicated to them.  I also used “post it” type notes so that when I run out of the seeds in that pocket, I can reuse the pocket.

book shot

Keeping the seeds in a binder, labeled and sealed, makes it so much easier to visualize what might be started come springtime!

flowers, garden

Puttin’ on my shades

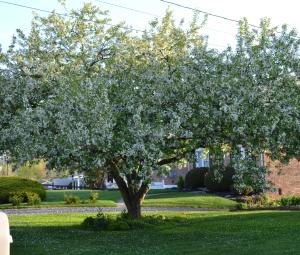
I really haven’t thought much about the shade garden for the past few years. It was my ‘original’ original, the first garden I planted from scratch, so to speak. So much work to prepare the ground and find the right plants to survive in the shade of my beloved crabapple tree.

Crabapple

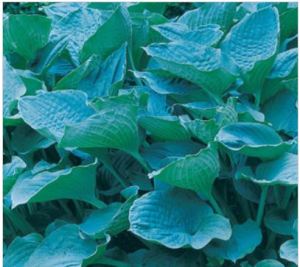
As in most gardens in areas that freeze, some of the perennials make it through the winter, some do not. That’s the main reason I have tried to map out my gardens, so that from year to year, I will recognize what pops its head out in the spring.  Most of what has survived from year to year in my shade garden, without much attention from me, are the numerous hostas.  Once I realized how unbelievably easy they are to start, I gathered many varieties.  My favorite is a blue leaved giant variety I found at Spring Hill Nurseries.

Blue Hosta

I’m not a fan of the flowers that this specimen produces, as they are a bit obscene.  I snip them before they even bloom.

I have a few astilbes that I love, a deep red one and a beautiful white one.  The color fades on these, but even the dead stems add texture and variety to the garden.  Most of the color of this garden, however, comes from the impatiens that I plant regularly.  The search is on for some colorful items that recover as nicely as all the hostas.

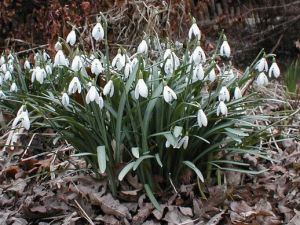
I found a lovely blog this morning called Carolyn’s Shade Garden that introduced me to an interesting shade flower called Snowdrops.  Turns out its a winter flower, and I was so excited to realize that Carolyn gardens in Bryn Mawr, PA which happens to be a zone 7a area.  Not much different that my zone 5b.

Snowdrops

I cannot wait to enhance my Shade Garden with some of the flowers I plan to purchase from Carolyn.  She offers Snowdrops and hostas on her website.  She speaks on cyclamen, and I’d love to obtain the secret of a successful cyclamen. Mine have a very interesting leaf, but lately all that I see from my crop are single pink flowers, no leaves.  Also plentiful on Carolyn’s site were Hellebores.

I was first introduced to Hellebores at the Philadelphia Flower show.  Last year, the theme was a British theme.  With England being the home of native Hellebores, most of the displays featured Hellebores of the soft green and white variety.  Subtle yet impressive; but if there are colorful Hellebores to be had, I’m gonna find them also!

Another website that I visited, A Way to Garden offers some good information on caring for Hellebores, in addition to information on adding a water feature to the garden.

Great plans are in the making for The Crabapple Shade Garden this year!